
We have been looking for a way to make our fine-art photographs more affordable and easier to sell from our Website. After reading an article by Brooks Jensen, we realized that one way to showcase our photos was to make a photographic folio for several of our collections of fine art photos.
The process of making a photographic folio
I have adapted Brooks Jensen’s technique to our specific artistic approach and like the results. Not only are these folios a viable product to sell, but they are also a classy way to present work to a client or give as gifts to friends and family. Would you like to learn how to make a photographic folio to showcase your photos? Well, let me describe how we do it.
Parts of a photographic folio
First off, let me be clear about how I define a photographic folio. In broad terms, it is a limited-edition collection of handprinted photographs collected into a protective container that allows someone to easily remove and examine the individual prints. The prints are usually no larger than 8.5 x 11 inches, making them economical to frame individually or as a group. These are the pages included in one of our folios:
- Title page. This page combines the title with a description of the work. The description helps the viewer relate to the work and may include other interesting facts about it and its production. [clearright]
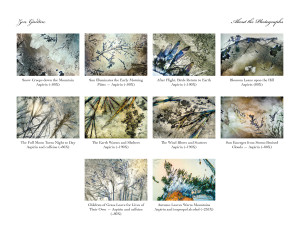 Visual table of contents. All the photos in the folio are sized to fit on one page. I put the title below each small photo so that I do not have to take up additional space for a title on each print. [clearright]
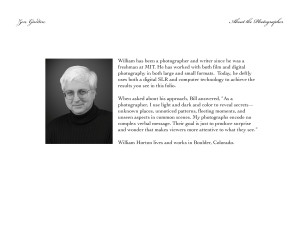 Short bio. Keep your bio simple and include your photo. Direct viewers to y our Website to learn more about you and your work. [clearright]
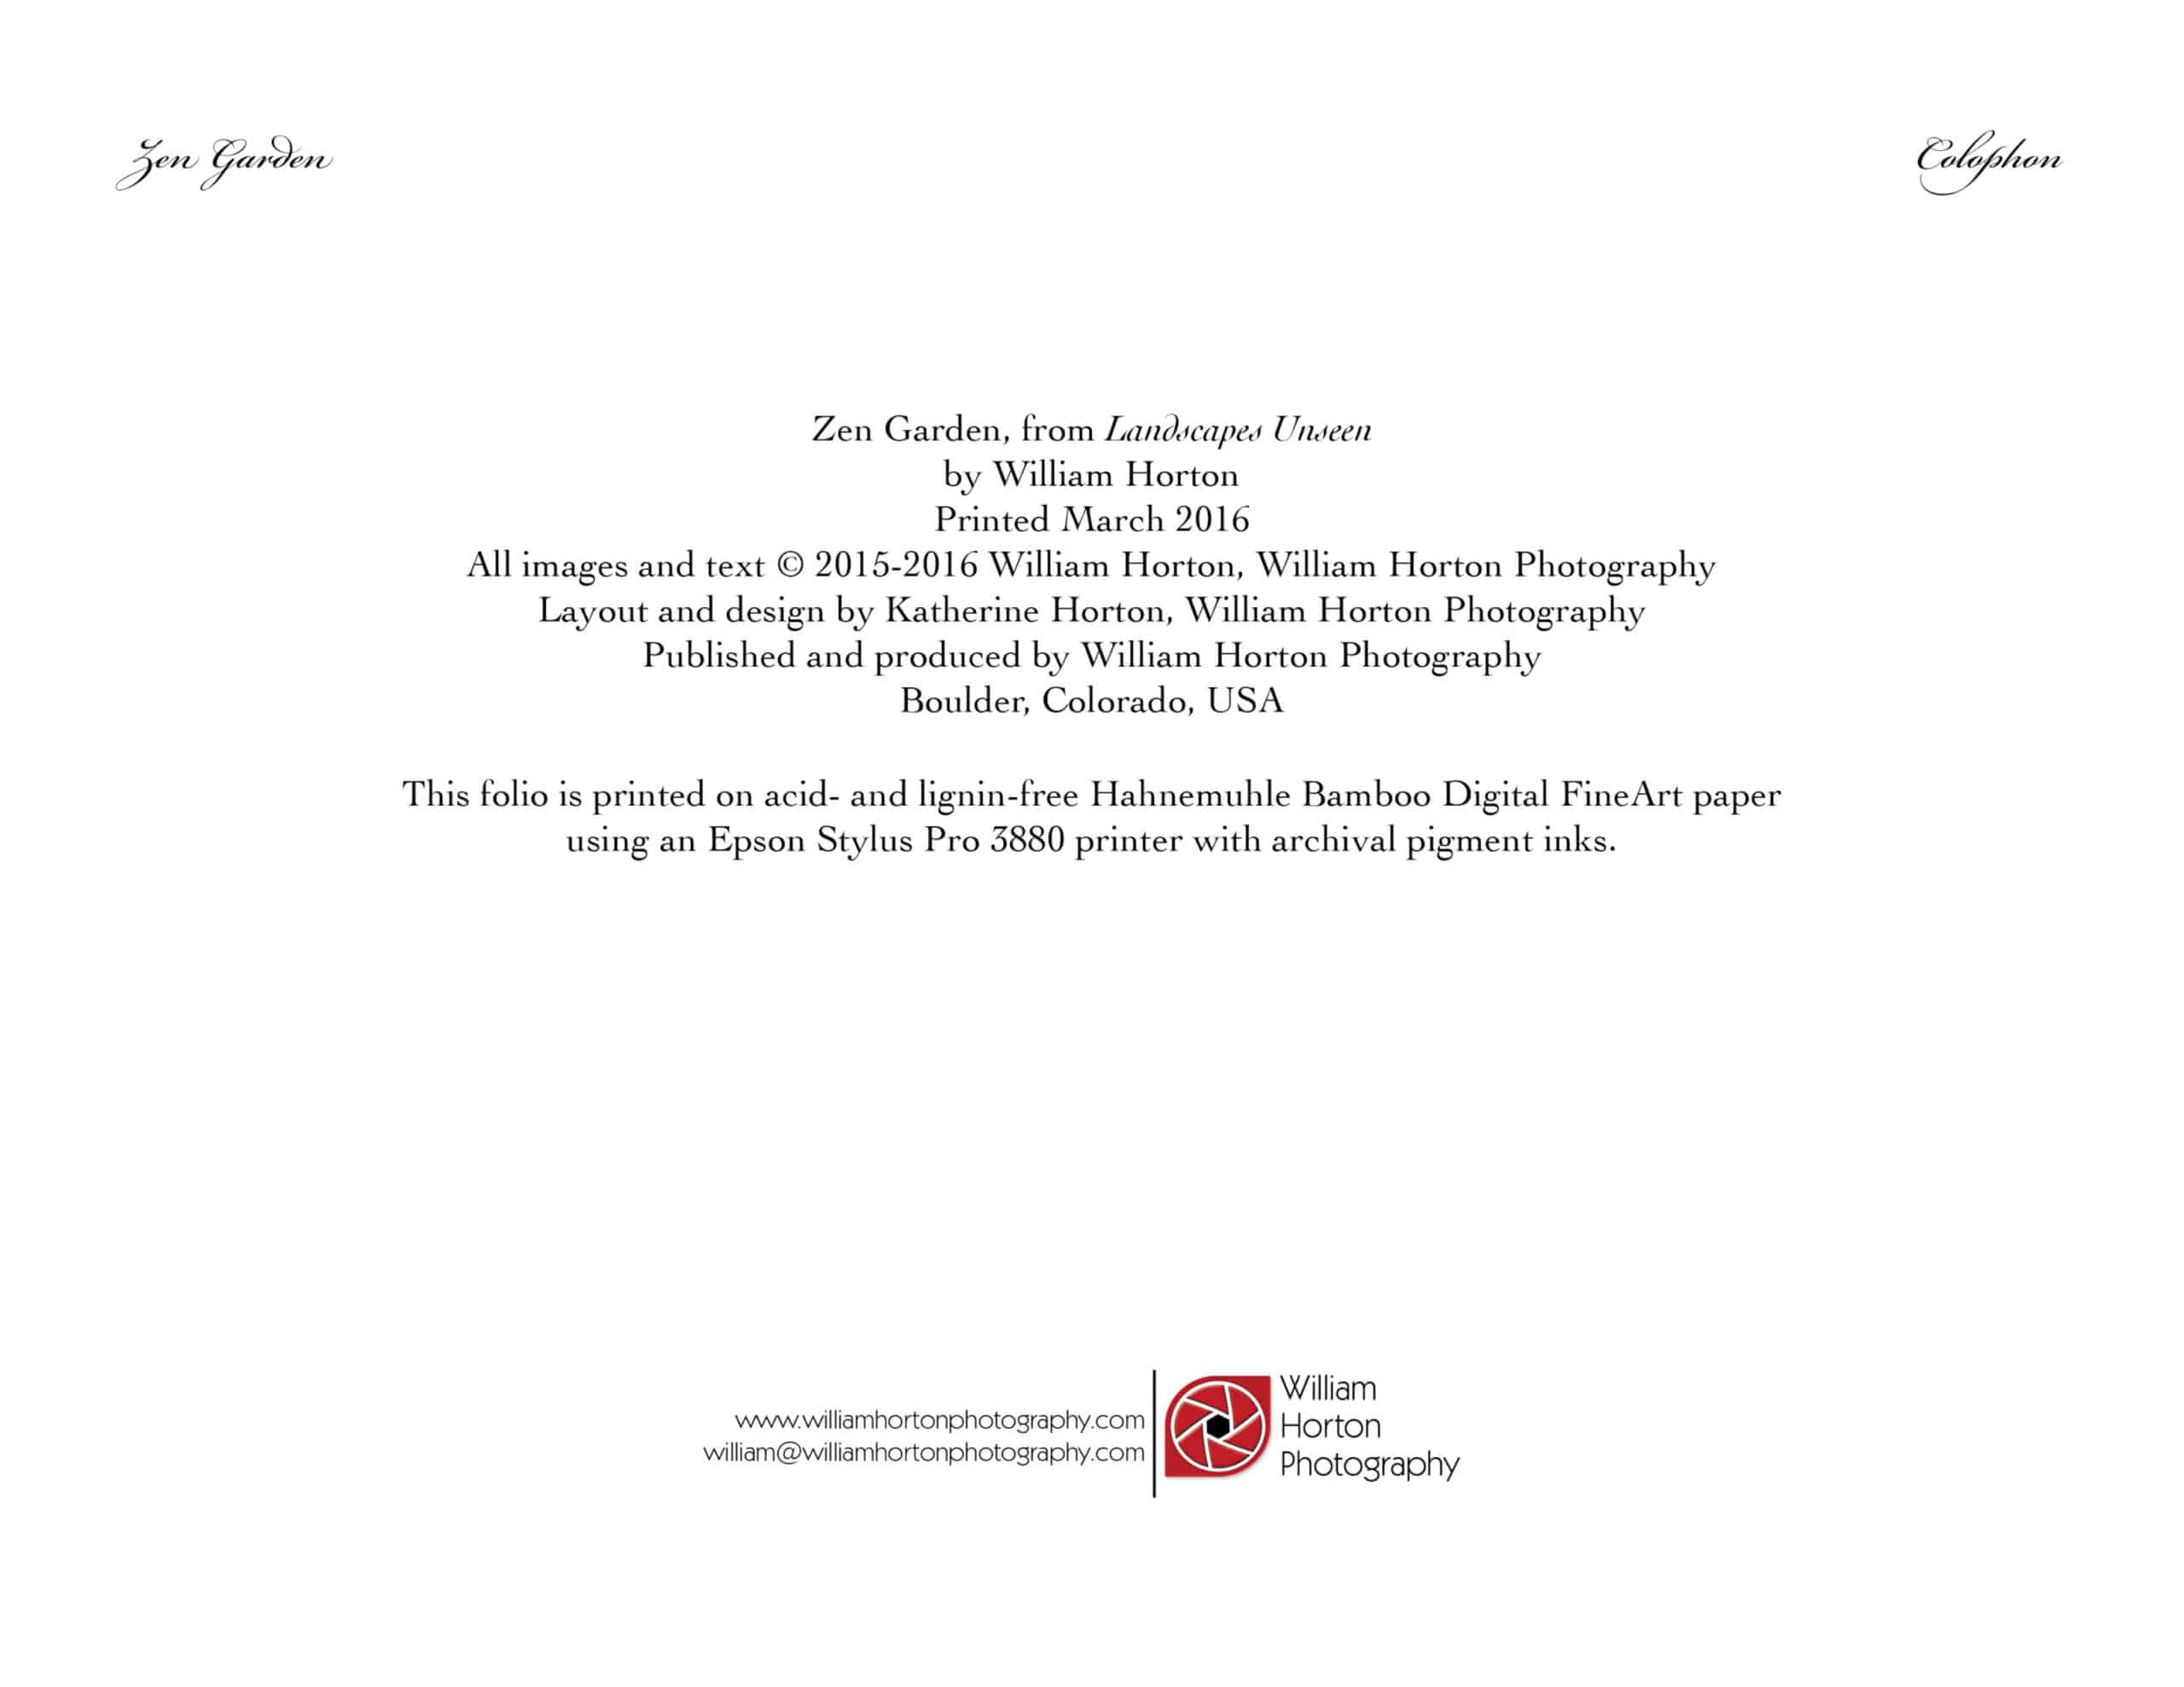
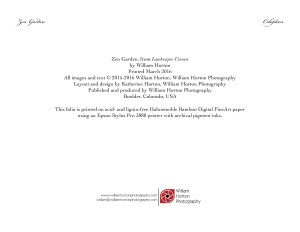 Colophon. The colophon communicates all the technical information about the folio, such as the [clearright]
- Ten or twelve prints.


Needed materials and equipment
What do you need to create a photographic folio? Here’s what we use:
- High-quality printer and inks. Most importantly you will need access to a high-end printer in tip-top working order. We have an Epson Stylus Pro 3800 (discontinued and replaced with the Epson SureColor P800). It is still the most commonly used printer among photographers and most paper manufacturers have ICC print profiles for it. When we get to printing the folio, you will see how these profiles fit into the workflow. Also, ensure you are using the recommended inks for your printer. This is not the time to be using remanufactured ink cartridges. The integrity of your work depends upon using the recommended archival inks.
- Fine-art paper. I use high-quality archival printing paper, such as Hahnemuhle Photo Rag Satin, Hahnemuhle Bamboo, Moab Entrada (slightly less expensive), or Moab Slick Rock Pearl. Our choice of paper is determined by the theme of our folio.
- Presentation container. You need a way to protect and deliver the folio. I sometimes make folders, using black, heavy, archival art paper. For other situations, I purchase ready-make press-board folders with string ties. You can also purchase archival presentations boxes from large photo supply stores.
Designing the photographic folio
A photographic folio is a work of art and needs to be designed. This entails making editorial decisions, creating visual elements, and writing descriptive material. Here are typical design tasks:
Choose a body of work to feature
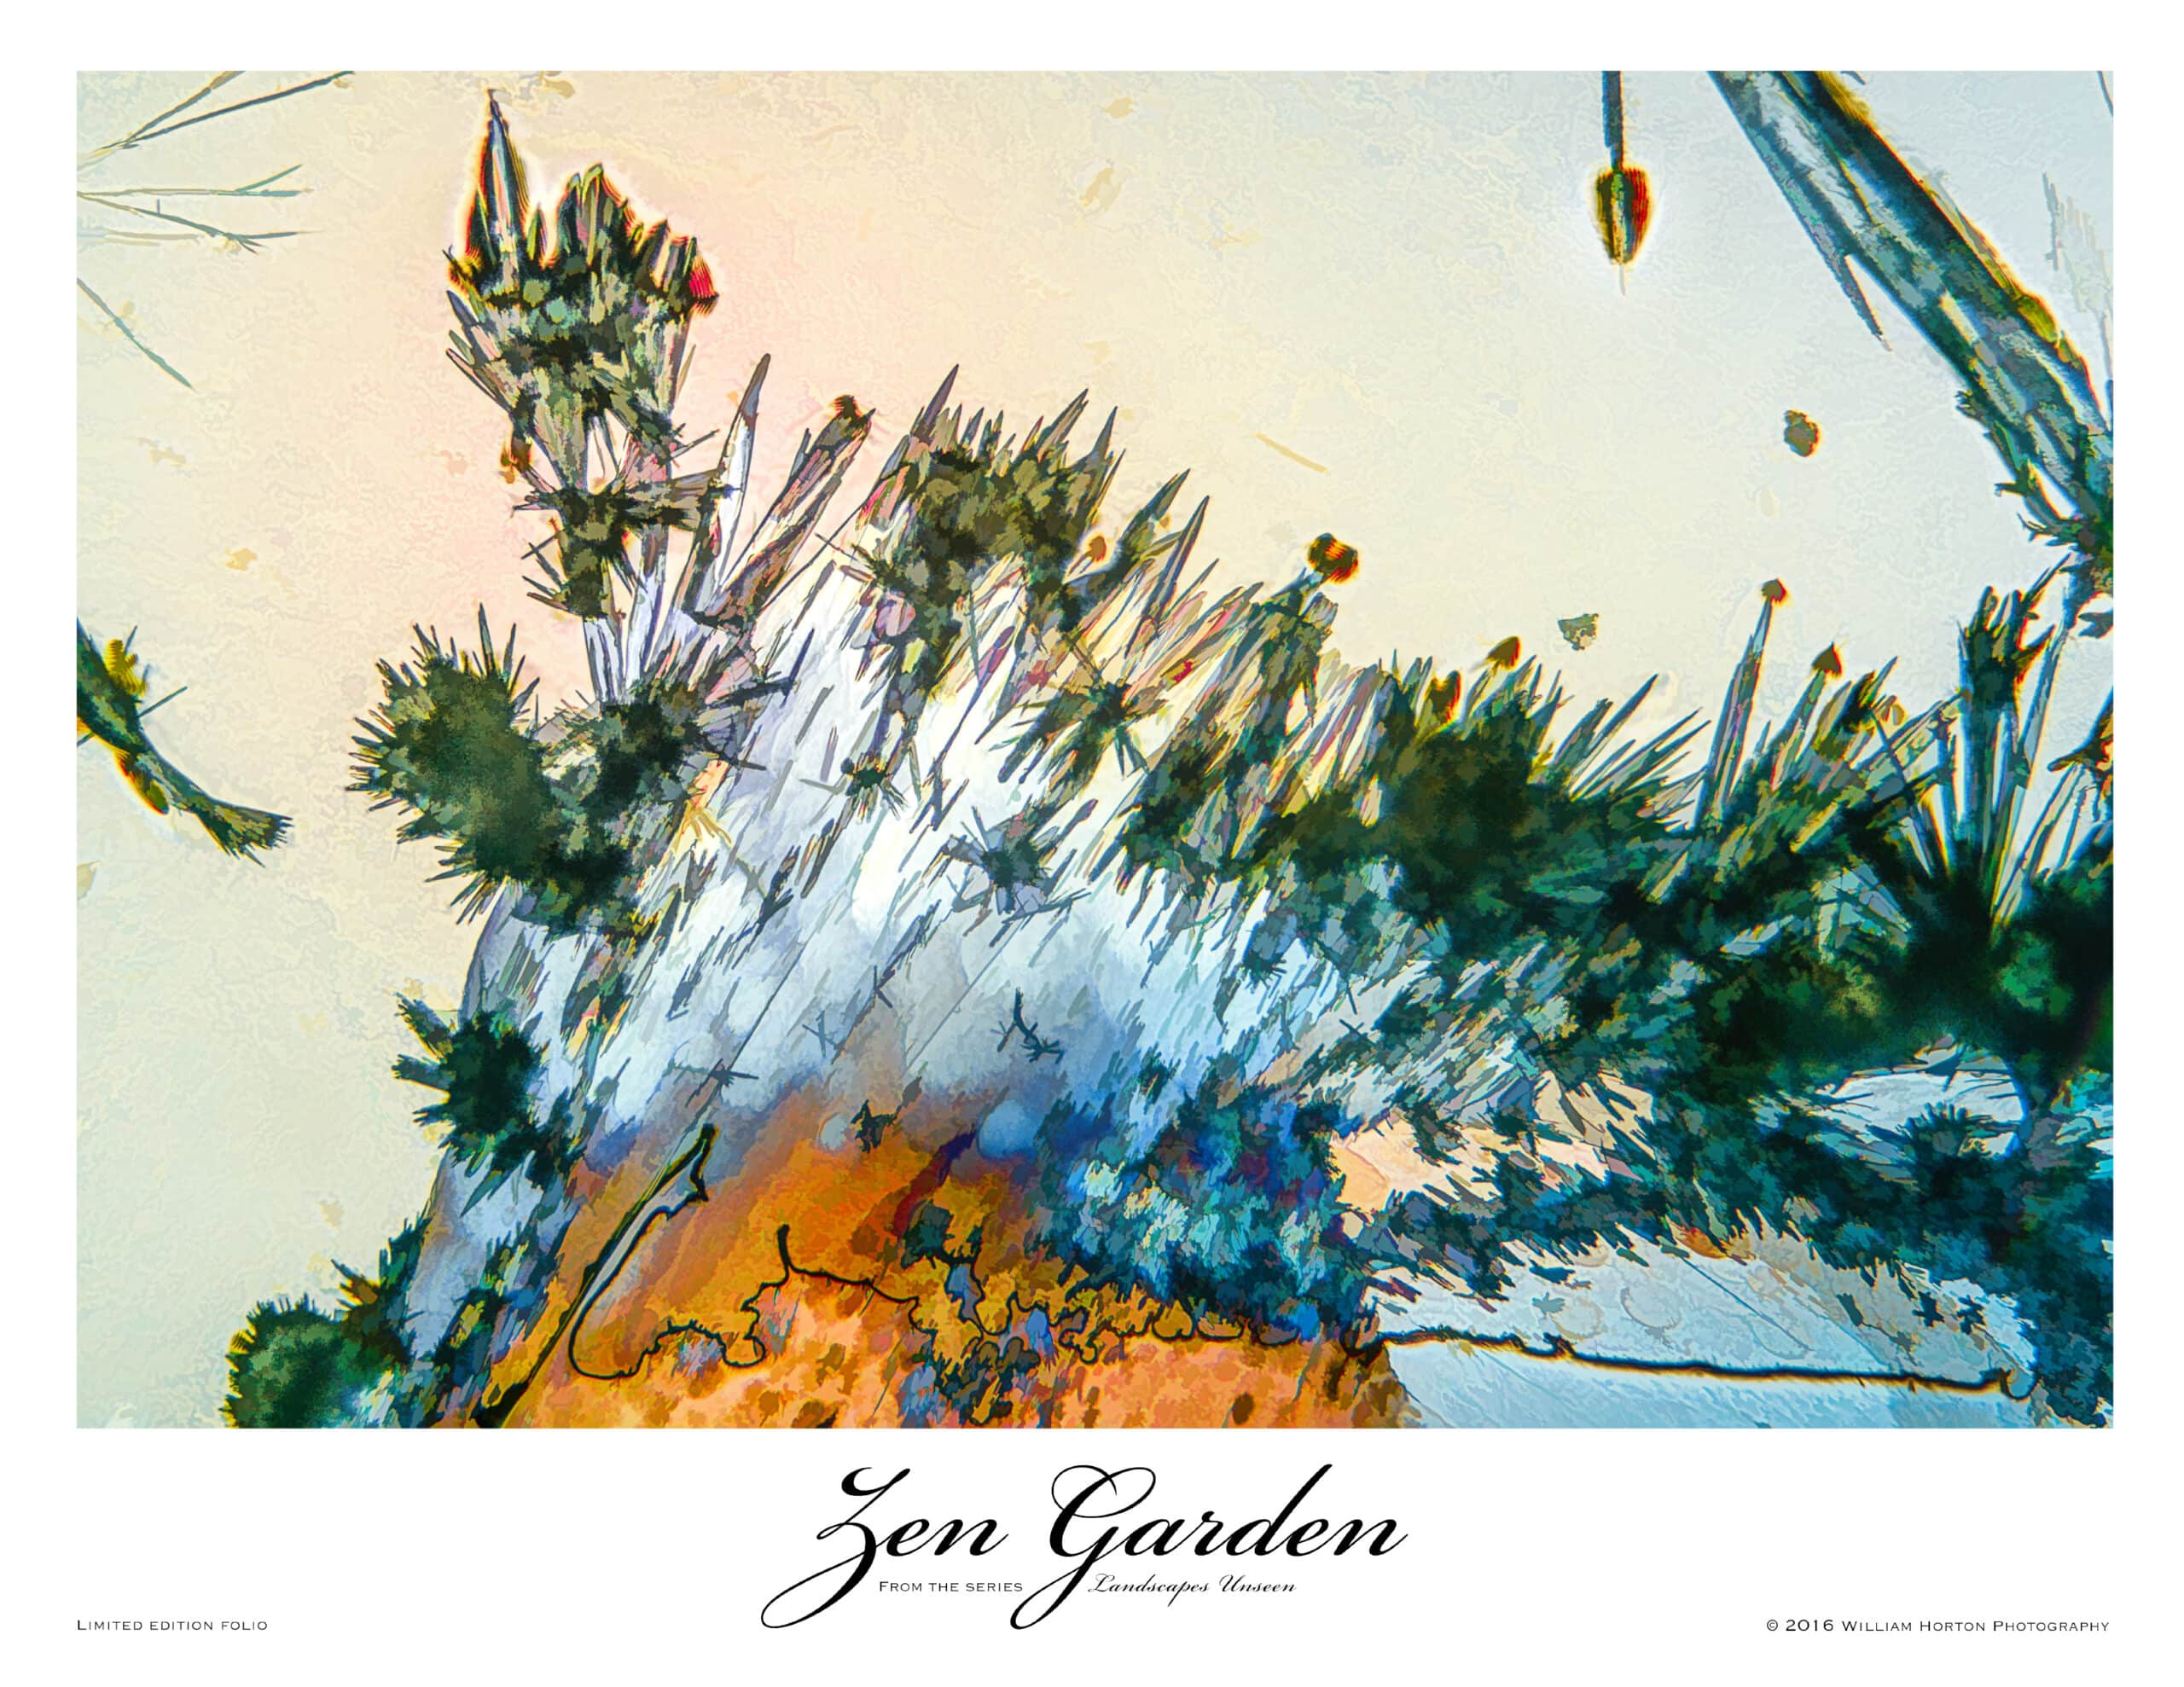
A folio needs a unifying theme. For our Zen Garden folio, Bill and I chose photomicrographs that have an Asian flavor and evoke the beauty and mystery of a Japanese garden. Other themes might be based on location, subject-matter, or capture technique.
Title the folio
The title should entice viewers to take a closer look. Use the title to help viewers understand your unifying theme or message. You can also craft a sub-title to amplify the main title. In our case, Zen Garden is the main title and the sub-title is “From the series: Landscapes Unseen.” Here, the sub-title communicates that our folio is part of a larger grouping called “Landscapes Unseen.”
Craft an introduction
The introduction should set the stage for your viewer. Help people feel and see your work as you do. Consider using a story. If it is practical, describe your process and, perhaps share technical details. Keep the introduction succinct so that it fits neatly on one page.
Brand the folio
To brand the folio, design an identifying graphic or logo to visually distinguish the folio in ads and articles. In our case, this branding appears on each print and on the enclosing folio folder. For our folio, I designed logotype, choosing a unique font face for the title, Zen Garden. This logotype is used anywhere the title appears. Here is the graphic we use to brand the Zen Garden folio:
Prepare a printing template
Preparing a template ensures that each print is consistent. A template takes into account the desired margin, position of the photo or graphic, the placement of the logo, and header or footer. If your work is not all the same orientation—for instance not all horizontal or vertical—you will need several printing templates. We use Adobe Lightroom to manage all our photographs; and, one of its features is a robust printing module that makes it easy to create printing templates.
Decide the edition number
How many copies of the folio do you want to make? 10 or more? Limiting the number of folios printed adds exclusivity to you work. And, if you give away or sell out an edition, you can always do a Second edition—but it should sell for less than folios in the First edition.
Select your printing paper
Selecting the right paper is essential. We discussed earlier that your paper must be high-quality, archival stock. Now that you have chosen the work for your folio, you need to make a final paper selection. If necessary, print a sample folio image on each of the paper stocks you are considering. As you examine the results, compare how each finish and tone compliments the subject of your photo.
Preparing to print
You thought you were ready to print, didn’t you? No, no, no. Not yet. There are still some tasks you need to perform.
Calibrate your computer monitor
As you edit each photo on your computer, you want to make sure that what you see on your monitor is what will come out of your printer. Calibrating your monitor will put the odds in your favor. The process can be a little fiddly, but it is worth the effort. We use the Spyder from Datacolor.com.
Download the ICC Profile
Paper manufacturers have a ICC profiles for all the popular high-end printers (a different profile for each type of paper). Download and install the specific printing profile for the paper you have chosen. Accompanying the profile will be instructions on how to install it.
Test the chosen paper
Print a selection of photographs you plan to use. To save paper, you may be able to use a printer preset (such as you find in Lightroom) that will allow you to print multiple photos to a page. In the various print dialog boxes you encounter, be sure you choose the correct ICC print profile and correct paper type recommended in the instructions for the ICC profile. Check this test print for color quality and saturation, and check for detail. For instance, are the black areas too black or the colors not quite right? You may need to do a soft proof using your downloaded printing profile. A soft proof will allow you to view a simulation of the printed page on your monitor. You may need to make some color adjustments to ensure your printed results match your desired results.
Test the print layout.
To test the print layout, simply print a draft copy of each photo on regular office paper. Be sure to check the margins and the position of the photos with regard to any captions, logo, or logotype. Note: Be sure that you use the same paper feed you will use for the final prints. Using the automatic feeder tray may not produce accurate results.
Clear a large area for drying prints
Make sure you have a large surface in your workroom, where you can place each print to dry. It needs to be dust-free and away from open windows or air ducts.
Printing
At last, all the pre-work is done and you are ready to print. Here are some tips to make the process smooth and frustration-free.
- Decide whether to print all the pages in an edition at one time. You can either choose to print each edition of the folio separately; or, you may want to print each folio page multiple times based upon your chosen edition number. Frankly, it doesn’t matter. If your printer is well-maintained, the last print is going to look the same as the first print. Just keep track of your editions. We use an Excel spreadsheet for that.
- Print each page of your folio separately. High-quality printers like the Epson Stylus Pro 3800 are set not to print high-quality photo paper from the multi-sheet feeder.
- Make sure to dry your prints. Place each print on a dust-free surface to dry overnight. Your printer may advertise that their inks dry quickly and do not smudge; but, the inks still need to gass-out before bundling them into a folio.
- Print the identity cards. If you are planning to print cards for the outside of the folio envelope, print them at the same time and dry them overnight. I usually print multiple cards at a time so that it is easier to assemble a folio when I need to.
Assembling the photographic folio
Now, it is time to put your folio together. Gather up the pages and slide them into the folio envelope. The order of each page in the folio is up to you. The order we use is:
- Title page with a short description
- Visual table of contents with titles
- The photo pages in the order they appear in the visual table of contents
- Bio page
- Colophon
Finally, attach an identity card to the outside of the envelope. You can glue it, cut slits to hold the corners of the card, or use photo corner mounts. For our folios, we mount the card on the back of the envelope using photo corner mounts.

Resources for making photographic folios
Epson P800 printer – Here is the B&H Photo Video listing for this printer: https://www.bhphotovideo.com/c/product/1140436-REG/epson_scp800se_surecolor_p800_inkjet_printer.html
Hahnemuhle Photo Rag Satin paper – https://www.bhphotovideo.com/c/product/802312-REG/Hahnemuhle_10641454_Photo_Rag_Satin_8_5.html
Hahnemuhle Bamboo Fin Art paper – https://www.bhphotovideo.com/c/product/802830-REG/Hahnemuhle_10641404_Bamboo_Fine_Art_Paper.html
Moab Slickrock Metallic Pearl – https://www.bhphotovideo.com/c/product/896812-REG/Moab_f01_slp260851125_Slickrock_Metallic_Pearl_260.html
Moab Entrada Rag Bright 300 – https://www.bhphotovideo.com/c/product/502819-REG/Moab_R08_ERB300851125_Entrada_Rag_Bright_300.html
Portfolio envelope – Jam Paper: https://www.jampaper.com/ecom/index.asp/show/detail/cat/171/prd/1210/c/5595/s/3617?gclid=CKqu9fDZ3M0CFZKCaQodTnoENg